Weaving continues, and gets funner!
First, mechanics: here are the levers that control the raising and lowering of my little loom's harnesses (the four metal frames that hold the heddles).
When a harness gets lifted, the specific threads that have been drawn through its heddles are raised, allowing me to run a line of weft between those threads, and those that are left below, loose and level.
(That wooden, boat-shaped thing is the shuttle, and one of my favorite tools on the planet. It holds a bobbin suspended inside, which feeds out weft thread as the shuttle is passed through and amongst the warp threads.)
As you can see, I started by running a few lines of blue through, to stabilize the weave...a sort of scaffolding from which to start building the actual structure of the scarf (I'll remove them once the whole thing comes off the loom, before I tie up the ends). Then I started following my pattern, using the off-white, cloud-soft alpaca wool that I've been periodically cuddling on my shoulder like a kitten ever since I bought it last week. Seriously. Ridiculously soft.
This part of the process, for me, is a lot like watching seedlings poke their heads out of the soil. One knows, intellectually, that all that's needed for seeds to grow are a few basic elements--make sure they get sunlight and water, and that nothing stomps them out--and odds are, they'll grow into plants, all by themselves, because that's what seeds do. But still, somehow, it's always a thrill and a surprise to see them surviving, building on their own mysterious architecture...you know?
That's how it feels to watch the pattern emerge. It makes sense that everything would work out as planned...but I never really believe it will until I actually see it before my eyes. Here's the pattern as it finally appeared, its first cycle.
As I keep working, advancing the wheel, and rolling the finished fabric around the front beam, I keep track of how long the woven portion is is by marking it with a tag every so often--keeping note of the inches, then feet, as they roll by.
I'm up to 52 inches at this point. Just a few feet to go!
Thursday, May 19, 2011
Wednesday, May 18, 2011
Hey, remember that big piece that I've been threatening to make for months and months (and months) now?
Well, time to make good. Once I'd decided to make it a single-panel object (as opposed to the half-a-dozen-panel-altarpiece-style assemblage I originally agonized over), I proceeded to order and pick up the supporting structure from my carpenter. It fit in my car with no problems, strapped over the reclined passenger seat and resting on the dashboard, and I remember thinking, "Geez, I could have ordered this another foot long, easy."
Then I brought it home, maneuvered it inside, and leaned it up against the wall. And then I remembered! As I had been planning, I hadn't made my car length the size limit, but rather, our apartment's ceiling's height. Good call, Cedra.
I figured out a sturdy but quickly strikeable easel solution--bless you, folding chairs--and then started doing loose outlines and color field blocking.
Well, time to make good. Once I'd decided to make it a single-panel object (as opposed to the half-a-dozen-panel-altarpiece-style assemblage I originally agonized over), I proceeded to order and pick up the supporting structure from my carpenter. It fit in my car with no problems, strapped over the reclined passenger seat and resting on the dashboard, and I remember thinking, "Geez, I could have ordered this another foot long, easy."
Then I brought it home, maneuvered it inside, and leaned it up against the wall. And then I remembered! As I had been planning, I hadn't made my car length the size limit, but rather, our apartment's ceiling's height. Good call, Cedra.
I figured out a sturdy but quickly strikeable easel solution--bless you, folding chairs--and then started doing loose outlines and color field blocking.
Aaaaaaaand off we go! Only a couple of weeks to work before I'm gone for a month (and then job hunting upon my return), so I'm motivated to make the most of it.
Tuesday, May 17, 2011
I feel very honored to have been invited by my [exceptionally talented, kind, and generally awesome] friend Juan Wijngaard to participate as his chosen guest artist in the Corrales Bosque Gallery's Shared Visions exhibition.
In addition to submitting one of my large, recently-finished works, Point, I also made a couple of new, small paintings (about an inch to three inches each) on paper, with the idea of hanging something that I could price modestly enough to move.
The show opens this Friday night, and promises to be completely packed full of interesting work, so if you're in the Albuquerque area, I'd be pleased to see you there!
In addition to submitting one of my large, recently-finished works, Point, I also made a couple of new, small paintings (about an inch to three inches each) on paper, with the idea of hanging something that I could price modestly enough to move.
The show opens this Friday night, and promises to be completely packed full of interesting work, so if you're in the Albuquerque area, I'd be pleased to see you there!
Friday, May 13, 2011
I decided I wanted to make myself a new scarf to take with me on the trip (it's winter there, remember), so over the past couple of days I've been getting going on that, taking much joy in the novelty and indulgence of the activity.
I finally picked a pattern: "Anna Henriksson's Fancy."
I really like it when patterns are named for their creators (or their notable perpetuators). It reminds me to imagine the lives of the people who were doing this a hundred, or hundreds of years ago.
I've never done a tabby weave before and I'm not sure how it'll turn out; but really, with quality wool, good colors, and any kind of regularity, there's no chance of ending up with something not pretty, even if it's not what I intended originally.
I chose to make the warp (the threads that run the length of the fabric, as opposed to the width [the weft]) out of red wool. I got a variety of reds...variegating them strategically sometimes makes for a kind of shiny effect, which I like.
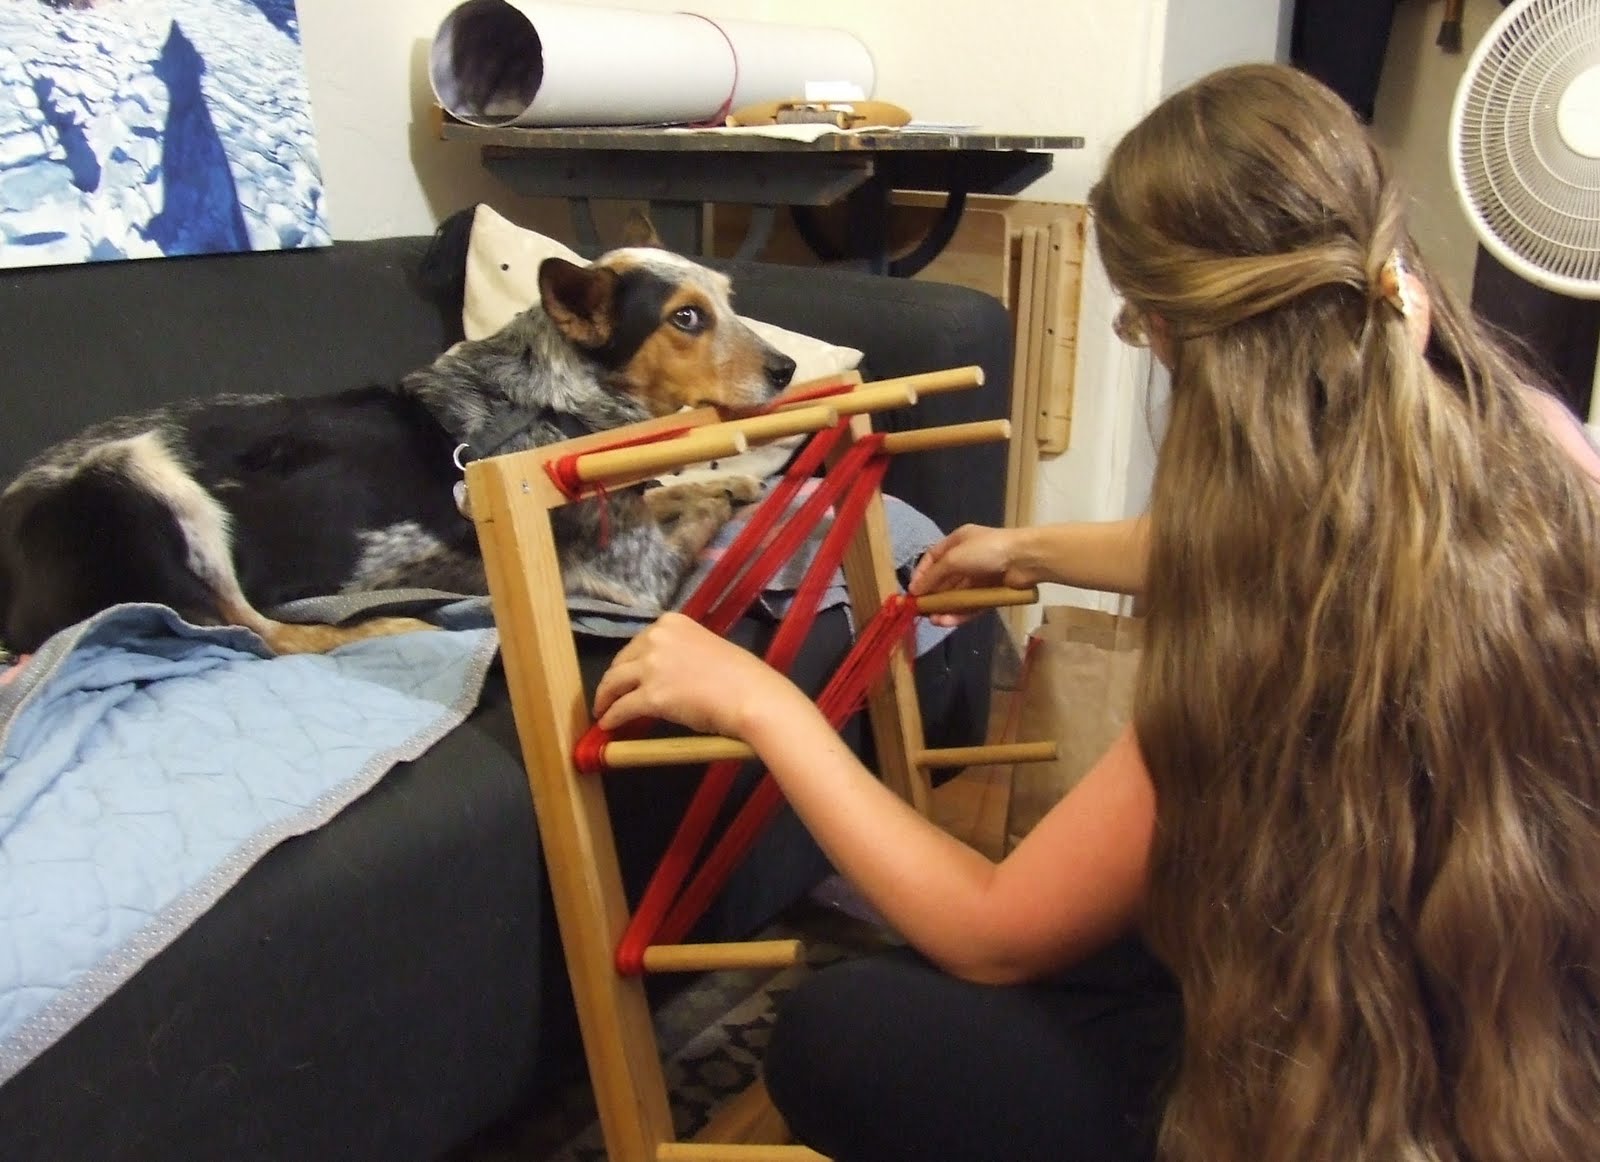
I received my warping board, like my table loom and my modest weaving skills, from Patty Savignac, my awesome instructor, some three years ago. It's so nice to have one of my own. I tried winding a warp on the legs of some overturned chairs a while back, and it worked (in a manner of speaking), but I don't recommend it.
Anyway, I wrapped the wool around the pegs of the warping board. Winding the warp helps keep the strands organized while they get fed into the loom.
Once I'd wound 182 strands around, I tied them up to keep them from getting mixed up or tangled, removed the warp from the board, and chained the whole thing carefully.
Then it was time for some loom involvement.
The next several steps are always time-consuming and repetitive, but the tedium is relieved by my enjoyment of my tools. I'm very proud of them! You can tell because I stamped my name on them! I made them one year at Ghost Ranch with some brass scraps while taking a jewelry class. The one on top is a "heddle-threader," used to draw the strands through the eyes of the needle-like loom components. The other one is used to "sley the reed" which performs the same service, but through the baleen-like structure used to keep the threads organized at the front of the loom (and beat the weft tightly into place, but that's later).
Here I am sleying the reed:
Here are the threads once they were all sleyed. They've been temporarily tied in back to keep them from falling back through the reed and getting all crazy-like.
Then it was time to thread the strands through the heddles (the long suspended needle-like things seen below). This took a little more concentration because the heddles are strung onto four different harnesses, and threading them in a very specific order is one of two major steps that will determine the final pattern.
Here they are, all threaded:
All those loose, but newly-organized threads got tied to a small metal bar on the back of the loom. The bar is attached by strings to a tension reel in the back, which, when cranked, eventually pulls the entire warp through the reed and heddles as it wraps it around the bar. Fred helped me by doing the winding, while I manned the front of the loom, combing snarls and making sure the warp maintained an appropriate degree of tension.
This left loose strings hanging in the front, now, ready be tied onto their own respective bar.
Here are all the loose ends, tied up in front:
I'll leave it all to stretch overnight, check the tension and re-tighten tomorrow....and then the actual weaving can begin!
Wednesday, May 11, 2011
Not the best photograph--I'll re-document later--but while I'm feeling the flush of accomplishment, I'm going to go ahead and post the painting I finished this afternoon.
Ta-daaaaa!
As is frequently the case, I'm greatly indebted to my model Anissa Sartini for her generosity with her image!
Ta-daaaaa!
As is frequently the case, I'm greatly indebted to my model Anissa Sartini for her generosity with her image!
Monday, May 9, 2011
So what's this about?
Well, I'll give you a hint:
Varnish-making!
The NM Musical Heritage Project crew met up for a final time this spring to make oil varnishes from scratch at Chris' home in the foothills. They'll be used later for a myriad of instruments, mine included. The process involves cooking turpentine, linseed oil, and rosin until the rolling, potent-smelling smoke draws complaints from multiple neighbors. Aaaaand then continuing to cook it for several hours.
This will be the last bit of news re: violins for a couple of months, methinks. The shop will be open occasionally again in July, but until then I'll have to satisfy myself with having reached a mid-point purfling landmark--scribing.
Using a knife and a picking tool, I went around the border of the belly, carving out a channel into which the sandwiched black-and-white-strips will finally go.
Well, I'll give you a hint:
Varnish-making!
The NM Musical Heritage Project crew met up for a final time this spring to make oil varnishes from scratch at Chris' home in the foothills. They'll be used later for a myriad of instruments, mine included. The process involves cooking turpentine, linseed oil, and rosin until the rolling, potent-smelling smoke draws complaints from multiple neighbors. Aaaaand then continuing to cook it for several hours.
This will be the last bit of news re: violins for a couple of months, methinks. The shop will be open occasionally again in July, but until then I'll have to satisfy myself with having reached a mid-point purfling landmark--scribing.
Using a knife and a picking tool, I went around the border of the belly, carving out a channel into which the sandwiched black-and-white-strips will finally go.
Tuesday, May 3, 2011
A second painting, Pool, has been bought this week.
I've been proud of this piece, and enjoyed having it around, but I'm glad that it's been liberated from the bubble-wrap and painting trunk that's housed it since the Lights All Askew in the Heavens exhibit. I'm especially glad that it's with collectors that will appreciate, display, and enjoy it in their home.
Subscribe to:
Posts (Atom)