Friday, May 13, 2011
I decided I wanted to make myself a new scarf to take with me on the trip (it's winter there, remember), so over the past couple of days I've been getting going on that, taking much joy in the novelty and indulgence of the activity.
I finally picked a pattern: "Anna Henriksson's Fancy."
I really like it when patterns are named for their creators (or their notable perpetuators). It reminds me to imagine the lives of the people who were doing this a hundred, or hundreds of years ago.
I've never done a tabby weave before and I'm not sure how it'll turn out; but really, with quality wool, good colors, and any kind of regularity, there's no chance of ending up with something not pretty, even if it's not what I intended originally.
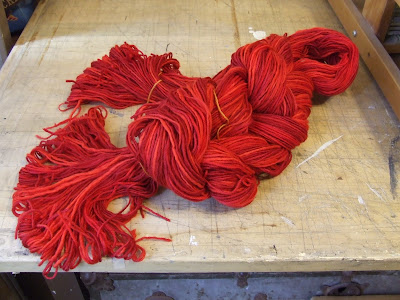
I chose to make the warp (the threads that run the length of the fabric, as opposed to the width [the weft]) out of red wool. I got a variety of reds...variegating them strategically sometimes makes for a kind of shiny effect, which I like.
I received my warping board, like my table loom and my modest weaving skills, from Patty Savignac, my awesome instructor, some three years ago. It's so nice to have one of my own. I tried winding a warp on the legs of some overturned chairs a while back, and it worked (in a manner of speaking), but I don't recommend it.
Anyway, I wrapped the wool around the pegs of the warping board. Winding the warp helps keep the strands organized while they get fed into the loom.
Once I'd wound 182 strands around, I tied them up to keep them from getting mixed up or tangled, removed the warp from the board, and chained the whole thing carefully.
Then it was time for some loom involvement.
The next several steps are always time-consuming and repetitive, but the tedium is relieved by my enjoyment of my tools. I'm very proud of them! You can tell because I stamped my name on them! I made them one year at Ghost Ranch with some brass scraps while taking a jewelry class. The one on top is a "heddle-threader," used to draw the strands through the eyes of the needle-like loom components. The other one is used to "sley the reed" which performs the same service, but through the baleen-like structure used to keep the threads organized at the front of the loom (and beat the weft tightly into place, but that's later).
Here I am sleying the reed:
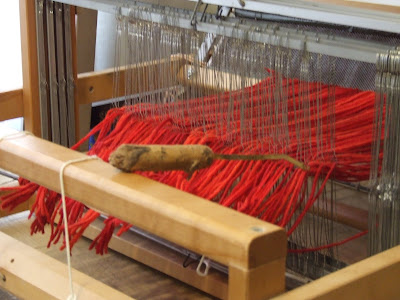
Here are the threads once they were all sleyed. They've been temporarily tied in back to keep them from falling back through the reed and getting all crazy-like.
Then it was time to thread the strands through the heddles (the long suspended needle-like things seen below). This took a little more concentration because the heddles are strung onto four different harnesses, and threading them in a very specific order is one of two major steps that will determine the final pattern.
Here they are, all threaded:
All those loose, but newly-organized threads got tied to a small metal bar on the back of the loom. The bar is attached by strings to a tension reel in the back, which, when cranked, eventually pulls the entire warp through the reed and heddles as it wraps it around the bar. Fred helped me by doing the winding, while I manned the front of the loom, combing snarls and making sure the warp maintained an appropriate degree of tension.
This left loose strings hanging in the front, now, ready be tied onto their own respective bar.
Here are all the loose ends, tied up in front:
I'll leave it all to stretch overnight, check the tension and re-tighten tomorrow....and then the actual weaving can begin!
Labels:
Weaving
Subscribe to:
Post Comments (Atom)


I'm in awe.
ReplyDelete